Packaging and Closer Look


If you have bought an iFi device before, then they haven’t change the packaging for their portable devices at all. You (still) get that clean white rectangular box, pretty much standard for most of iFi’s products. In front of the box you see the iDAC2’s photo and some of its features and specifications are printed at the back of the box. I actually like this kind of standard packaging. You can pretty much stack up these boxes neatly, specially if you bought or have other micro devices (like micro iDSD, iCAN SE, iTube and etc). Even the smaller nano series, like the iFi nano iDSD, have the same packaging.

The micro iDAC2’s packaging includes a reading material, an RCA interconnect, USB 3.0 to USB Type-B cable, four rubber feets and the micro iDAC2 itself. By the way, I noticed that iFi changed the rubber feets compared to the previous ones. iFi’s logo is engraved on each rubber feet, but the rubber feet itself is thinner compared to the rubber feet that came with my micro iDSD. I like the previous rubber feet that came with my micro iDSD. It’s a little bit thicker, thus giving it more clearance between the bottom of the device and the surface.


Above you see the top and bottom view of the micro iDAC2. The enclosure is pretty much standard design of an iFi portable device. On the top portion, there are three tiny holes with their respective labels. The play or arrow indicator changes color depending on the audio format that you are feeding the iDAC2. The LED colors are as follows: Green – 44/48 kHz, Yellow – 88/96KHz, Cyan 176/192 kHz, White DXD352/384 kHz, Blue – DSD2.8/3.1 MHz, and Magenta DSD5.6/6.2/11.2/12.2MHz.
At the bottom of the micro iDAC2, you can find the labels for the respective connectors; and some of its features are printed at the bottom as well. I’m not sure what type of ink or paint they used to print the wordings and logos, but I wish they change it with a better and more adhesive one. There is a tendency that the ink/paint can be rubbed off. In this case, you can use the iDAC2 even without the wording at the bottom. But in the case of the micro iDSD and micro iCAN SE, you need those labels since both device have switches on them.


Here are more photos of the iFi micro iDAC2, this time from the sides. There’s nothing on the sides of the iDAC2 except for its stylish engraved lines that gives you a better grip of the device.
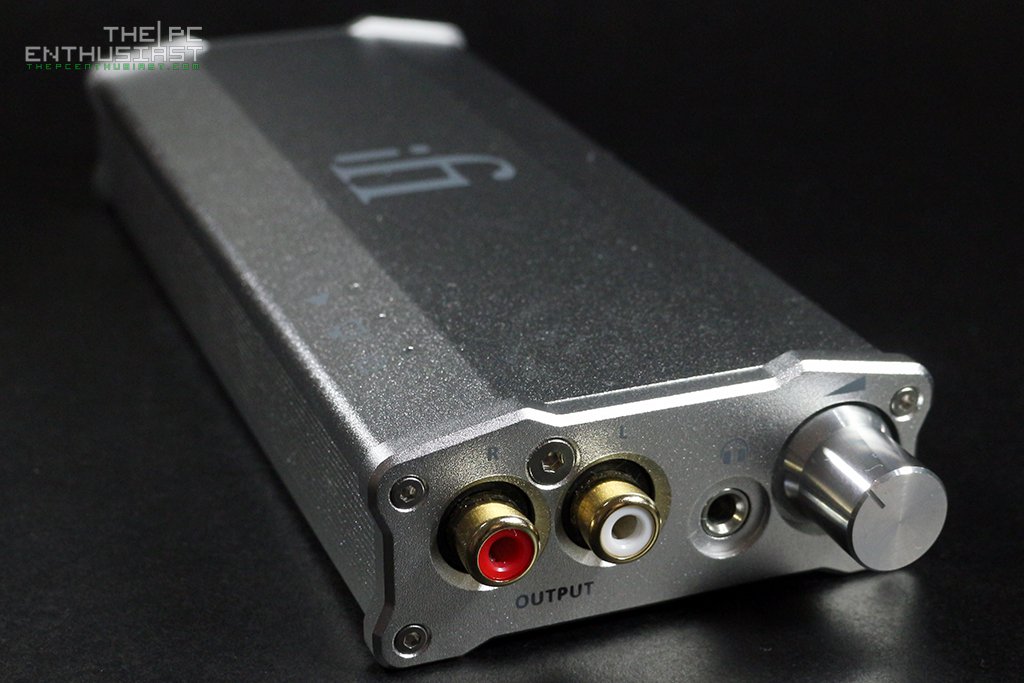
At the front portion of the micro iDAC2, there’s the RCA left and right output connector, the 3.5mm headphone connector and the volume knob. Personally, I find the 3.5mm headphone connector too close to the volume knob. Whenever I plug a headphone or IEM on that output port, it’s a little bit annoying or difficult whenever I need to adjust the volume knob and there’s a 3.5mm plug partially blocking its way, specially if the 3.5mm plug is thick.
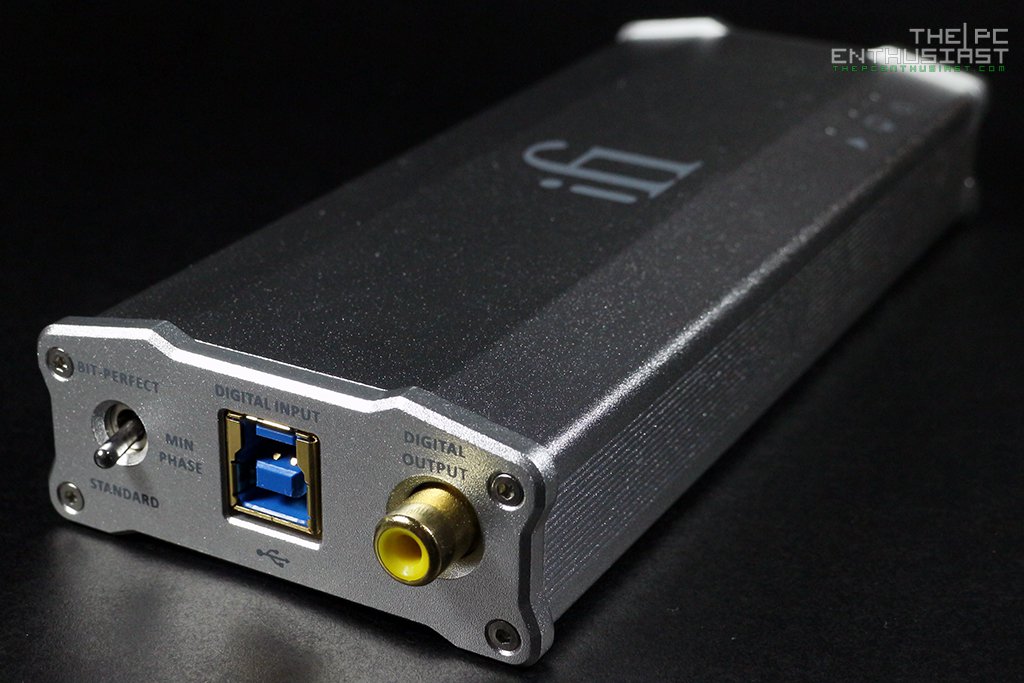
Meanwhile, at the back of the micro iDAC2 you can see the SPDIF or digital output, the USB 3.0 Type-B digital input and filter switch. iFi recommends for best sonics, with PCM music use Bit-Perfect and for DSD music use Extreme. However you also need to try the different settings and see which you prefer. Most of the time, I just set it to Standard and leave it as it is.

Opening the micro iDAC2 requires some hexagonal screwdriver or hex key, and you also need to pull out the volume knob. Above you can see the components on the top portion of the iDAC2’s PCB. The Elna Japan Silmic II is clearly visible on the middle of the PCB, together with the other capacitors and transistors. Two oscillators can be seen near the clock and SPD-out connector. Did you notice there are no chips on the top portion of the PCB? Well, let’s flip it and see what’s on the other side of the PCB.

At the bottom portion of the iDAC2’s PCB you can see more of the components like the Burr-Brown DSD1793 DAC chip, XMOS USB chip and more. Notice that the USB digital input section is somewhat cut-out or separated from the main PCB. I think this is to ensure that the incoming signal stays clean and noise free.
By the way, if you are a Windows user, you do need to download the drivers from iFi Audio’s site for the micro iDAC2 to work properly. For Apple MAC OSX and Linux users, no driver is needed since USB audio class 2 is supported natively.
Next page, it’s time to listen with the iFi micro iDAC2…